Lucy McWilliam has been a customer of Racewood since 2008, when she purchased her first Riding Simulator. This year, with the support and encouragement of one of her clients, she was able to upgrade to a fully interactive Dressage Simulator. We chatted to Lucy about being a riding coach, incorporating the simulator into her methods and why it wasn't always plain sailing...
Q1. What drove you to begin training with a simulator? What was it you felt you could do to make a difference?
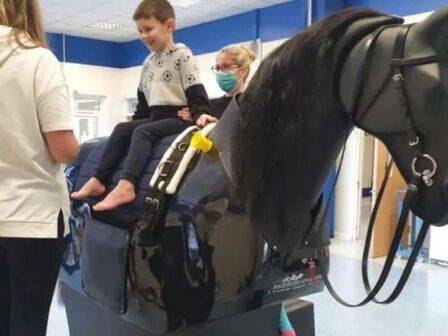
I first came across the Simulators when a yard I had worked at approached me and asked if I would like to use ‘Frank’ to teach the more novice clients. Frank was one of the older models with a wooden head. I worked very closely with a client who was recovering from major surgery and her physio had suggested she try riding. Looking for a safe alternative she looked at the simulators. The changes I was able to make to not only her position/ mobility but also her confidence were amazing. She was very persistent that I should invest of a simulator of my own. Having worked with horses since I left school I was becoming disheartened with the equine industry and I saw the simulator as a chance to be able to make a real change to how people approached riding. The simulators allowed an element of proof that real horses don’t. In other words they aren’t as forgiving as a real horse. The rider has a real chance to see what it is they are actually asking from the horse. From here it is possible to break down many of the more traditional ways of teaching riding in a way that means people can understand whats being asked of them, why and what that means to a horse. I made a deal with my client that if she rode a real horse again I would take the plunge and buy my first simulator. Barney arrived in 2008.
Q.2 What challenges did you face at first, and how did you overcome them?
It wasn’t all plan sailing, whilst I and clients that I have worked with could see the benefits of the simulator there was still a lack of understanding about what the benefits were and why you would use one. I faced criticism mostly from other instructors who failed to see how I could know how someone rode without ever seeing them on a real horse. I approached a big organisation to get their approval but they said they didn’t recognise the simulators. Funnily enough they use them themselves now. I took Barney to Your Horse Live and didn’t switch him off both of the days we were there so I knew the demand was there. In fact in my experience the people who speak negatively about the simulators have mostly never even been on one. Gradually and with amazing support from my clients I began to build a reputation and haven’t looked back since.
Q.3 What sets your business/offering apart from others?
My business is about nurturing the relationship between horse and rider and making it possible for anyone to have a go. For me when a client comes in it’s not just about what they look like but how they absorb the movement, How someone reacts to an instruction, the relationship with their horse and how we can bring all this together to create a theory of riding that works for them and their horse. I’m not try to teach my style of riding rather raising awareness of what a client is doing in the saddle, the effect this has on the horse and creating a tool kit they can use when riding alone. The simulator is a perfect partner for this allowing mistakes without judgement and building confidence through understanding. I wouldn’t say I specialise in anything in particular other than loving horses and understanding how much really goes into just riding.
Q.4 Can you tell us a little more about how and why you upgraded your model?
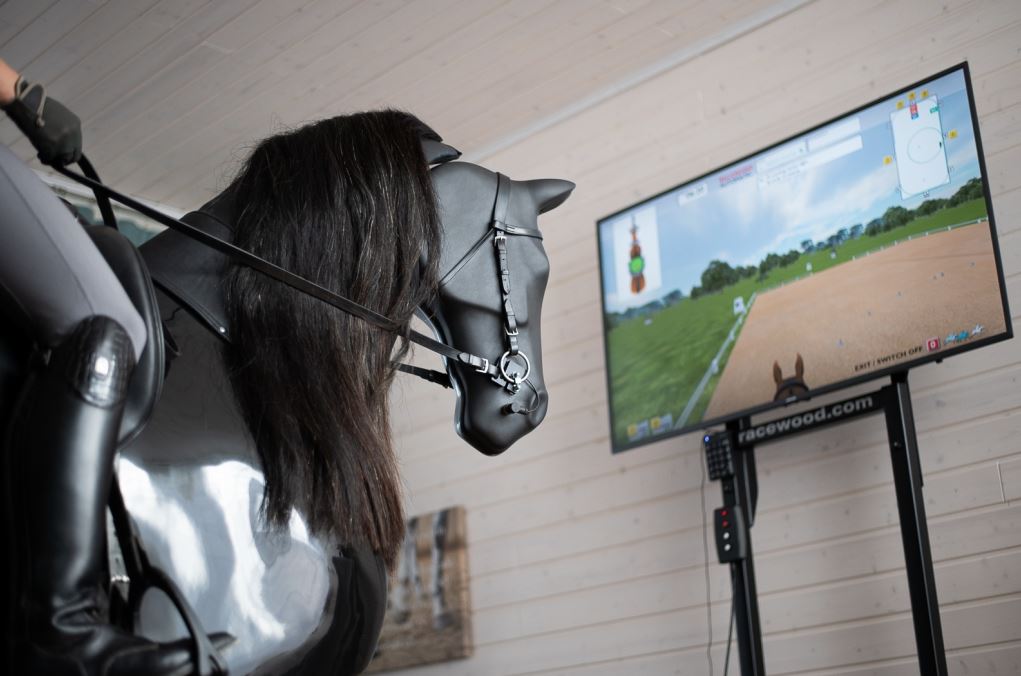
2024 and Roo arrives. I sold Barney and was going to have a break but on my break I realised I missed it too much. I started using Llyod a simulator at a yard local to me. Once again after much encouragement from clients I upgraded to Roo the dressage simulator. It’s been interesting using a simulator with a screen this time around having never had one with Barney. It takes me back to the feeling that the simulators provide the element of proof only this time not only is the simulator helping to protect the horse but it also protects me as an instructor. The simulators are incredible but what they can’t do is tell you how to fix it. That’s my job and sometimes hearing that you may be the problem or that you aren’t as straight as you thought can be tricky for riders to accept. The simulator becomes a different horse many times in one lesson with the data on the screen reflecting the changes I am making . It allows me as an instructor to raise a riders awareness of what they, not me or their horse is actually doing. Roo has been a great new addition but Barney will always hold a place in my heart 😄
Q5. What can riders typically expect from a session with you?
I always find it hard to say what you can expect when visiting me and Roo. It’s so different for everyone. I teach what’s in front of me in that moment in time. Very similar to how a horse responds to the rider.
Q6. Can you describe your current set up? How often are you teaching and what sort of clients are you seeing?
I’m currently at Wymondham Windmill which is a lovely site. We have a variety of shops a great tea room. It’s easy to come for your lesson and then spend the morning pottering around. I currently work 5 days a week fitting teaching in around my son’s school hours and a full day on the weekend. I teach a huge variety of riders. Dressage riders, eventers, dressage judges. Happy hackers, people using it for rehabing and people just wanting to be better riders for their horses.
The variety suits me I believe anyone from any background should be able to access riding and feel welcomed and comfortable when doing it.
Thanks Lucy!! If you would like to book in with Lucy, you can track her down via her website. If you would like to discuss purchasing your own simulator, get in touch at [email protected]
Q1. What drove you to begin training with a simulator? What was it you felt you could do to make a difference?
I first came across the Simulators when a yard I had worked at approached me and asked if I would like to use ‘Frank’ to teach the more novice clients. Frank was one of the older models with a wooden head. I worked very closely with a client who was recovering from major surgery and her physio had suggested she try riding. Looking for a safe alternative she looked at the simulators. The changes I was able to make to not only her position/ mobility but also her confidence were amazing. She was very persistent that I should invest of a simulator of my own. Having worked with horses since I left school I was becoming disheartened with the equine industry and I saw the simulator as a chance to be able to make a real change to how people approached riding. The simulators allowed an element of proof that real horses don’t. In other words they aren’t as forgiving as a real horse. The rider has a real chance to see what it is they are actually asking from the horse. From here it is possible to break down many of the more traditional ways of teaching riding in a way that means people can understand whats being asked of them, why and what that means to a horse. I made a deal with my client that if she rode a real horse again I would take the plunge and buy my first simulator. Barney arrived in 2008.
Q.2 What challenges did you face at first, and how did you overcome them?
It wasn’t all plan sailing, whilst I and clients that I have worked with could see the benefits of the simulator there was still a lack of understanding about what the benefits were and why you would use one. I faced criticism mostly from other instructors who failed to see how I could know how someone rode without ever seeing them on a real horse. I approached a big organisation to get their approval but they said they didn’t recognise the simulators. Funnily enough they use them themselves now. I took Barney to Your Horse Live and didn’t switch him off both of the days we were there so I knew the demand was there. In fact in my experience the people who speak negatively about the simulators have mostly never even been on one. Gradually and with amazing support from my clients I began to build a reputation and haven’t looked back since.
Q.3 What sets your business/offering apart from others?
My business is about nurturing the relationship between horse and rider and making it possible for anyone to have a go. For me when a client comes in it’s not just about what they look like but how they absorb the movement, How someone reacts to an instruction, the relationship with their horse and how we can bring all this together to create a theory of riding that works for them and their horse. I’m not try to teach my style of riding rather raising awareness of what a client is doing in the saddle, the effect this has on the horse and creating a tool kit they can use when riding alone. The simulator is a perfect partner for this allowing mistakes without judgement and building confidence through understanding. I wouldn’t say I specialise in anything in particular other than loving horses and understanding how much really goes into just riding.
Q.4 Can you tell us a little more about how and why you upgraded your model?
2024 and Roo arrives. I sold Barney and was going to have a break but on my break I realised I missed it too much. I started using Llyod a simulator at a yard local to me. Once again after much encouragement from clients I upgraded to Roo the dressage simulator. It’s been interesting using a simulator with a screen this time around having never had one with Barney. It takes me back to the feeling that the simulators provide the element of proof only this time not only is the simulator helping to protect the horse but it also protects me as an instructor. The simulators are incredible but what they can’t do is tell you how to fix it. That’s my job and sometimes hearing that you may be the problem or that you aren’t as straight as you thought can be tricky for riders to accept. The simulator becomes a different horse many times in one lesson with the data on the screen reflecting the changes I am making . It allows me as an instructor to raise a riders awareness of what they, not me or their horse is actually doing. Roo has been a great new addition but Barney will always hold a place in my heart 😄
Q5. What can riders typically expect from a session with you?
I always find it hard to say what you can expect when visiting me and Roo. It’s so different for everyone. I teach what’s in front of me in that moment in time. Very similar to how a horse responds to the rider.
Q6. Can you describe your current set up? How often are you teaching and what sort of clients are you seeing?
I’m currently at Wymondham Windmill which is a lovely site. We have a variety of shops a great tea room. It’s easy to come for your lesson and then spend the morning pottering around. I currently work 5 days a week fitting teaching in around my son’s school hours and a full day on the weekend. I teach a huge variety of riders. Dressage riders, eventers, dressage judges. Happy hackers, people using it for rehabing and people just wanting to be better riders for their horses.
The variety suits me I believe anyone from any background should be able to access riding and feel welcomed and comfortable when doing it.
Thanks Lucy!! If you would like to book in with Lucy, you can track her down via her website. If you would like to discuss purchasing your own simulator, get in touch at [email protected]